Showing posts with label Recipes. Show all posts

Wednesday, November 5, 2014

Stuffed Zucchini

Have loads and loads of zucchini again this year?

You know, I purposely only planted one zucchini plant this year and I still have more than I know what to do with.  Seriously!!!


So I was at a loss with what to do with it all.  I am pretty sure my friends were avoiding me so I wouldn't 'offer' (aka force them to take 3 or 4) them a zucchini or 2.  Whatever...


So I was talking to my mother on the phone and she gave me another brilliant idea… Stuffed Zucchini!  Woot Woot.  I was so excited I cooked it that night for dinner and just and to share it with you so you would have a brilliant idea too!

Conversation went something like this…

me, 'so, what are you having for dinner, I don't know what to make?'

mom: 'we are having stuffed zucchini, you know, like peppers but with zucchini.'

me: 'I think your a genius, I'm pretty sure its hereditary, and I'm awesome too.'

Ok, maybe not that last part but I was super excited!

This recipe is so easy, and one of my all time favorites growing up.  Just altered for zucchini lovers like us!  So here it is...


You are going to need:
2 large zucchinis
1 pound ground beef
1 cup rice, cooked
1/2 lemon
1 can tomato paste
seasoning of your choice
      I usually go with salt pepper garlic and onion powder

slice your zucchini in half and scoop out most of the insides.


Brown some ground meat, how much will depend on how many people you are feeding.  I will generally do a pound for our family of 4.  And there are always leftovers.  With a pound of meat there was enough filling to fill 2 large zucchinis.


Anyway, now add some lemon (fresh squeezed if you have it, about a Tbsp of lemon juice of not) and a can of tomato paste.


add in your seasoning and rice and mix it all together.


Now stuff your zucchinis and place them in the oven and cook at 350˚ for about 30 minutes.


now plate and done!  This meal is great with some garlic bread and parmesan.  If you want you can put the cheese, any cheese you like ,on top before you cook it and let it get all melty in the oven too!


And a beautiful meal to serve your family and get rid of some of that zucchini in the pantry.  

Woot woot, double bonus!

Thanks for stopping by everyone, come back and visit us again soon,

 -Sarah

 We love that you stopped by and cant wait to see you again soon! If you liked Yuen Yarn, check out some of our older posts, Like us on FacebookFollow Me on Pinterest ,visit our ETSY shop, follow us on Instagram, follow us on twitter, or come see our website www.yuenyarn.com.

Wednesday, October 22, 2014

Witch Finger Halloween Snacks (for all your party needs)

Halloween Classroom Healthy Snacks

Ok, It's almost halloween again and I really just LOVED this post, so I wanted to share it with you all again!  They were super fun to make and really didn't take all that long.  I'm totally going to make them again for class treats this year!  So, without further ado, here they are!
  

It is finally halloween!  Are we ready for this?  NO!  But it is here anyway, what are you going to do, right?  

So Charly is having a pumpkin carving party at school but it was requested that we not bring sweet snacks.  After some searching and experimenting I finally came up with these little witch fingers to bring for the kiddo's.  I thought they turned out pretty stinkin' cute and just incase you need ideas too, here they are.


Healthy Halloween Witch Fingers

Here is what you will need:

string cheese (I wanted to make about 20 so I needed 10 cheese sticks)
a paring knife
some sparkle gel frosting
a clean paint brush


Now take your cheese sticks and cut them in half...


ok, time to start cutting in your knuckles.  

I promise, this really takes less time than you think.  I had 20 fingers done in less than 10 minutes.  


Next slice a small portion off the top where you want the fingernail to be.  


And finally it is time to start painting them. Place a small amount of gel in the fingernail space and paint it on where you want.  


 And done, see, I think the kids in class are going to get a kick out of them.  And they are healthy.  You don't have to feel bad about what you are feeding them in the middle of the day.  They are going to get plenty of candy, like they really need it in the middle of the day too!


And there you have it.  They really are not all that time consuming and turned out super cute!  And once again, your little one will thing you are awesome, amazing, Super Mom!

Thanks for stopping by everyone, come back and visit us again soon,

 -Sarah

 We love that you stopped by and cant wait to see you again soon! If you liked Yuen Yarn, check out some of our older posts, Like us on Facebook, Follow Me on Pinterest ,visit our ETSY shop or come see our website www.yuenyarn.com.

Monday, October 13, 2014

Cheesy Chicken Nuggets for the Kids

Homemade  Chicken Nuggets


I have to say, these are the best chicken nuggets I have made so far.  The kids loved them, they were nice and crunchy (not soggy like other recipes I have tried), and fairly healthy too!  


Don't they look fabulous?  Oh man, I was so excited about these i just had to share them with you.  


And they really were so simple...

All you are going to need is:

*2 chicken breast cut into about 1 in chunks
*1 cup of panko mixed with seasoning (salt, pepper, garlic and onion powder)
*1 cup of shredded cheese
*2 eggs beaten


Cut the chicken into your chunks
dip the chicken  into the egg, then the cheese, then the pank.  
Onto a cookie sheet and into the oven at 350˚ for 20-25 minutes


And like I said, the kids loved them.  I'm pretty sure they will be a weekly staple in our house for a while.  Like spaghtti and meatballs, something easy that the kids will eat without a fight.  (Makes my life infinatly easier.)  One less fight a day makes this mommy jump for joy.  


Thanks for stopping by everyone, come back and visit us again soon,

 -Sarah

 We love that you stopped by and cant wait to see you again soon! If you liked Yuen Yarn, check out some of our older posts, Like us on FacebookFollow Me on Pinterest ,visit our ETSY shop, follow us on Instagram, follow us on twitter, or come see our website www.yuenyarn.com.

Wednesday, October 8, 2014

Easy 6 Ingredient Lemon Chia Seed Muffins

6 Ingredient Banana Bread - Or Lemon Chia Seed if you're so inclined...


I know I have been gone as of late, not posting, not writing, not anything really.  But I'm back and ready to get typing again!  I have so much to share with you all that I will really have to write a whole  post about it but for now, lets just get started, shall we?


So, this is my sisters recipe and I have simply added Chia seeds and lemon extract to her already fabulous banana bread recipe to make it a little healthier.

This is one of the simplest recipes to whip up for hungry children in the morning.  I really love to have them on hand, pretty much all the time. And then the kids know that they can help themselves any time they like.


So the 6 ingredient recipe she gave me is:

2 overripe banans
1/4 cup sugar
1/4 cup oil or butter
1 tsp baking soda
1 tsp baking powder
1 1/4 cup flour


How simple, right?!?  (I've got it memorized since I make it so often.)


And aren't they cute.  I like to make the mini muffins for the kids, I find there is less waste if they an help themselves to 1 or 2 muffins rather than trying to finish a whole large muffin.

Now today I thought I wold try something new.  Why not add some chia seed to them, they are kind of like poppy seeds so I can make them lemon too.  Woohoo!  And they'll add a little protein and those fabulous antioxidants to my breakfast.

So I did the recipe above and added

2 tsp lemon extract
1/3 cup chia seeds

mix it all together…


Yes, I use my food processor, sshhhhhhhhh, don't tell anyone, that is why they have such high peaks, you shouldn't mix them so much.


But look how beautiful they turned out!  I was so excited I just had to share!  So here you go, and have a lovely morning!  And don't forget a good cup of coffee…  coffee, coffee, coffee… (I may have a problem, but we don't talk about it...)  or tea of course, or whatever your drink of choice!


Thanks for stopping by everyone, come back and visit us again soon,

 -Sarah

 We love that you stopped by and cant wait to see you again soon! If you liked Yuen Yarn, check out some of our older posts, Like us on FacebookFollow Me on Pinterest ,visit our ETSY shop, follow us on Instagram, follow us on twitter, or come see our website www.yuenyarn.com.


Wednesday, March 5, 2014

DIY Antiseptic Ointment

DIY 'Neosporin' Type Ointment

You are seriously going to love this recipe.  I know I do!  I haven't bought Neosporin in ages.


This stuff works great on all sorts of cuts, bruises, scrapes and any other minor injury you can think of.  I even love it for dry cracked hands and feet.

so without further ado, here it is….

You will need:
1/3 cup beeswax
1 cup olive, almond or coconut butter (I used olive oil)
1/4 top Vit E
15 drops tea tree oil
15 drops lavender
15 drops lemon
(and I added 15 drops eucalyptus also) but that is optional


Melt the oil, beeswax and Vit E over low heat until completely melted.


Completely melted…. be patient grasshopper…


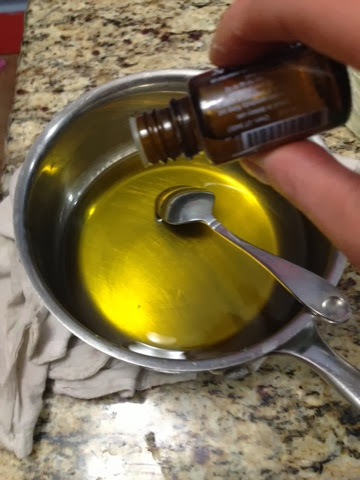
OK, now remove from heat and add your Essential Oils.


Put in a cute container and done.  This is one I had leftover in the basement.  (An old Nutella container.)


Ta-Da!  done-ski…


The lemon, lavender, tea tree and eucalyptus are all known for their antibiotic, antiseptic, and healing properties.


Thanks for stopping by everyone, come back and visit us again soon,

 -Sarah

 We love that you stopped by and cant wait to see you again soon! If you liked Yuen Yarn, check out some of our older posts, Like us on FacebookFollow Me on Pinterest ,visit our ETSY shop, follow us on Instagram, follow us on twitter, or come see our website www.yuenyarn.com.

Baileys After Dinner Cocktail

Super Easy and Fast, and Impressive, After dinner Cocktails


Here is one of my favorite after dinner dessert cocktails, courtesy of my mother, thanks mom!

A bit of baileys with some coffee ice cubes... Decaf or regular, whatever you choose of course.


All you are going to need is some pre frozen coffee cubes and a bit of baileys.  And you can he whatever type of baileys you like. I like to mix it up from night to night, or depending on the season.  


And if you want a little more kick or if the baileys is just too sweet for you you can adds shot of bourbon. Mmmmmm, so delish!

Here is another look, just cuz I think you need one...


Right?!  Gorgeous!  


Thanks for stopping by everyone, come back and visit us again soon,

 -Sarah

 We love that you stopped by and cant wait to see you again soon! If you liked Yuen Yarn, check out some of our older posts, Like us on FacebookFollow Me on Pinterest ,visit our ETSY shop, follow us on Instagram, follow us on twitter, or come see our website www.yuenyarn.com.