Showing posts with label things to do with the kids. Show all posts

Sunday, October 26, 2014

Lighted Monster Bottle Halloween Decorations

DIY Up-Cycled Wine Bottles to Halloween Decorations

I found a really cute idea on Pinterest the other day but of course being the resourceful gal that I am I tweaked it a bit to fit the supplies I had on hand.

Here is the original pin I saw that inspired these.

And here are the ones I made,


Lighted Monster Bottles


Aren't they so cute!?! I just live then, and the kids could even helps me them. That was the best part.

Supplies:
• empty wine bottles
• old Christmas lights
• tissue paper in different colors
• black and white card stock
• google eyes (if desired)

ok, so you will start off with your empty wine bottles.

Then you will want to soak them in water for a few minutes.  This will loosen the glue so you can get the labels off.  

Remove the labels...

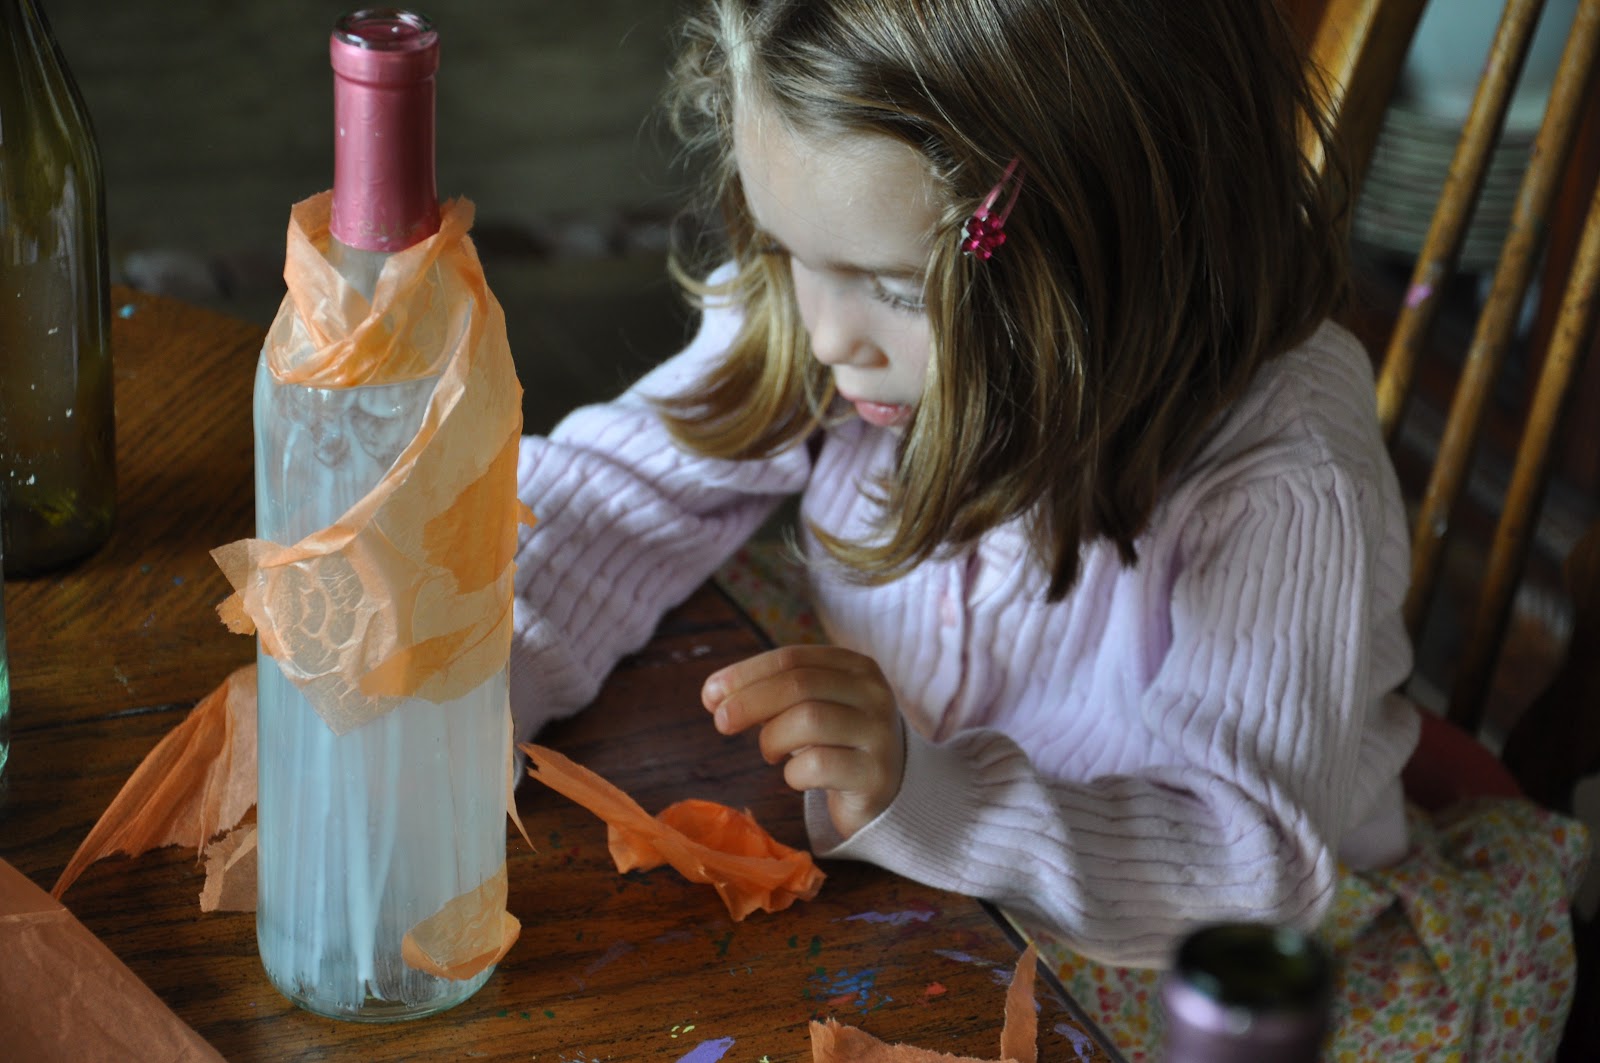
 Paint them with your Mod Podge and start covering with tissue paper.

Make some funny faces on your bottles with your card stock.  You will want to stick with simple shapes that will be seen easily since it will be back lit.  

 Add google eyes if you like, just to give them more character when they are not lit up.  

Now take your old christmas lights... 

 and start stuffing!  This is the most time consuming part...


 but aren't they worth it?  
I just love them and little one really loved working on a craft project with mommy!  I think they look so cute up there, I have them on my mantle.  I can't decide if I want to keep them there or if I will move them near the front door on Halloween but I suppose I have a little time to decide.

Halloween is getting closer and my kids are getting excited already.  Do yours know what they want to be yet?

-Sarah

Thanks so much for stopping by! If you liked Yuen Yarn, check out some of our older posts, Like us on FacebookFollow Me on Pinterest ,visit our ETSY shop or come see our website www.yuenyarn.com.

Thursday, March 27, 2014

Marbled Paper - Activities With Kids (And Shaving Cream)

Indoor Activities with Kids - Marbled Paper


This was such a fun activity to do with the kids.  And I think it would be great for kids of all ages.  The little ones will have a blast getting messy and older kid-os will love creating something.  A great indoor activity for these cold winter months (or fall, or spring, whenever really).

Here is what you will need:
washable paint
shaving cream
a cutting board for each child
plain white paper


first spray a little shaving cream on the cutting board


let them spread it all around,


add in some color and let them swirl it a bit.


now pat a plain piece of paper on top.


spread it out, make sure it is touching the foam all over.


now peal it up.


now you can let it dry like that and it is like a science experiment or you can take a squeegee (or anything with a straight edge like a ruler) and scrape off the foam.


or let them do it.


and the color is left on the paper.  Now they can use the paper to create another picture!  Draw on top of the marbling or use the marbling as inspiration.  Like staring at the clouds.  Whatever sparks their imagination.


As you can see this can get a bit messy but the kids had a blast!


Thanks for stopping by everyone, come back and visit us again soon,

 -Sarah

 We love that you stopped by and cant wait to see you again soon! If you liked Yuen Yarn, check out some of our older posts, Like us on FacebookFollow Me on Pinterest ,visit our ETSY shop, follow us on Instagram, follow us on twitter, or come see our website www.yuenyarn.com.

Monday, January 27, 2014

More Activities With Kids

More kids activities… aka what to do with them all winter long


How about making painted foot prints.  My kids love doing this.  There is something extra special about getting to paint body parts and stick them on paper.  Now with this one make sure you are using washable paints, this little project will get messy.  But that is ok, throw them outside this summer, let them paint their entire bodies, then hose them off with the sprinkler before they come in.


Here you can see I just did a couple foot prints but by the end they were covered head to toe.


Now the real trick is to see if you can get them to make a nice foot print, they usually turn out like this one.  

Plus I like to keep a couple of these a year.  If you date them, it is fun for the kids to see the difference in their foot sizes on paper.  


Thanks for stopping by everyone, come back and visit us again soon,

 -Sarah

 We love that you stopped by and cant wait to see you again soon! If you liked Yuen Yarn, check out some of our older posts, Like us on FacebookFollow Me on Pinterest ,visit our ETSY shop, follow us on Instagram, follow us on twitter, or come see our website www.yuenyarn.com.

Saturday, January 25, 2014

DIY Glitter Crayons

Re-cycled Glitter Crayons

How Fun, right?!         GLITTER!!!!!!       I don't think you can go wrong with glitter.


These were so fun and easy to make.  And I was happy to get all those old crayon pieces out of a bucket!  The kids really liked helping with this project too!


Well, in this picture you can't really see all the broken piece, They are all probably at the bottom.  At any rate, all you need is some old crayons, an oven safe pan, any shape will do, and your oven!


These are actually ice cube trays, I wasn't sure how they would hold up but they did great since the oven is at such a low temp.


Oh yeah, and glitter of course.  You have to have glitter, right?!


So, peel all the paper off your crayons…


Place your crayons in your molds...


sprinkle with glitter and place in a 200˚ oven for about 10 minutes.


Or until they are all melty, like this...


You could sprinkle some glitter on top as they start to harden too.


And another 10 minutes later you can pop them out of the trays and you have glitter crayons.  You can give them away as gifts or keep them for yourself. 


Aren't they cute!


I loved how they turned out and the kids love using them as well!  


Thanks for stopping by everyone, come back and visit us again soon,

 -Sarah

 We love that you stopped by and cant wait to see you again soon! If you liked Yuen Yarn, check out some of our older posts, Like us on FacebookFollow Me on Pinterest ,visit our ETSY shop, follow us on Instagram, follow us on twitter, or come see our website www.yuenyarn.com.

Monday, January 13, 2014

Activities With Kids (Build A Fort!)

Looking for a good indoor activity with the kids?  

What about a fort?


As the weather remains cold and the kids are copped up through the winter I find myself having to get more and more creative with indoor activities.  Here is one that is super simple, only takes a couple minutes to build (and put up, I might add!  Also super important.) and you kids are going to think you are a super hero!


All you are going to need is a couple of chairs, your couch, some pillows, the largest flat sheet you have, and some binder clips.  The binder clips make a huge difference, by the way, for keeping the sheet draped where you want it.


And tada!


See, binder clips.  Super easy.


The kids will even want to help you put it up.


And they played for hours in there!


Goofy girls!


Sorry about the picture quality, poor I know, but you get the gist.


Thanks for stopping by everyone, come back and visit us again soon,

 -Sarah

 We love that you stopped by and cant wait to see you again soon! If you liked Yuen Yarn, check out some of our older posts, Like us on FacebookFollow Me on Pinterest ,visit our ETSY shop, follow us on Instagram, follow us on twitter, or come see our website www.yuenyarn.com.