Showing posts with label organiztion. Show all posts

Tuesday, November 13, 2012

Toy Room Reorganization and a Christmas Tradition

Toy Room Makeover and our Christmas Toy Tradition...

Ok, now to tackle the toy room.  This was another on the to-do list and I am super excited to have it done!  It took some convincing on my part to get started but once I did I was glad.


So here are my before pics.  We had just moved this bed into the kids toy room / guest room.  We always had a bed in there but as you can see, this bed is ginormous!  We finally upgraded to a king size bed as a queen was just nor big enough for our family of four plus 2 dogs.  THe kids don't sleep with us but inevitably one, if not both of them, sneak in in the middle of the night.

Anyway, I just felt crowded in there and, quite frankly, for the kids that is fine but I thought my family might feel uncomfortable in there.  Plus I didn't want them to fight with the tulle canopy over the bed.  Although the kids like it, it may be a bit much for adult company.

So I went to work...

I first started moving things around, pulling out old toys, and generally reorganizing what I already had.  I didn't want to buy more furniture for that room so I had to make due with what was there.

I already had all those baskets on the shelves for different groups of toys, and although they don't stay that way after the kids have been in there unattended for a month, it makes me feel better to know they do have a place.


It was right about this time I started to get scared.  Started thinking, oh lord, what have I started. But I persevered...


See, when I organize, it is a hot mess until I am done apparently.  I just like to pull everything out and start over, apparently!


By the way, I left the kids to fend for themselves for a couple hours and when I came out to check on them at one point this is where I found my eldest.  She said she was reading.  Then here sister said 'your not supposed to find her!' and slammed the door, then there were tears, and yelling, and hitting, and I had to break it up.  And then they were friends again...  aaah, the inner workings of sisters.


And now..... dun da na na....


I moved the toy box into the closet and filled it with all their dress up cloths (yes, it is full, I think it may be their favorite game at home).

I moved the shelves together, took down the tulle canopy and turned it into a makeshift curtain for the shelves.  I know you can see through them but I still think it would be better to look at when your lying in bed than a pile of toys.  I also wanted to hang them from a curtain rod but I didn't have one lying around so I just tacked the curtains to the ceiling.


See,

closed,

              open.


I will leave it open for the kids to play in most of the time but at least now I have the option to close it if I want.


I love it and I am so glad I talked myself into it.

Christmas Toy Tradition

This was also a good opportunity for me to weed out the old toys that they don't play with anymore as well as have the kids pick out 2 toys each that they would like to donate to less fortunate children this holiday season.  We have done this for the past 4 years and I really like giving the kids the opportunity to help someone in need this time of year.  There were some tears this year but our incentive has always been that if you don't have any toys you would like to give away, there will be less toys Santa will bring you on Christmas.  It seems to get them in the spirit as well as clears some room in to toy room for after the holiday.

They have been too young to go somewhere to donate with me in the past (I have laways just gone to the local thrift store), but this year I would really like to take them with me to show them that their toys are going to a good cause.  Does anyone have any ideas on where I can go that will take used toys and the kids can see who is getting them?

Thanks for stopping by everyone, come back and visit us again soon,

 -Sarah

 We love that you stopped by and cant wait to see you again soon! If you liked Yuen Yarn, check out some of our older posts, Like us on Facebook, Follow Me on Pinterest ,visit our ETSY shop or come see our website www.yuenyarn.com.

Monday, November 12, 2012

Kitchen/ Home Office Reorganization

Office Organization

So I don't know about you guys, but I have this terrible habit of coming home and placing, piling, throwing all my stuff on the table and counter in the kitchen. I know it is a bad habit but I haven't been able to break it. The computer is in the kitchen and that is also where the kids come home, empty their backpacks and do their homework. So you can imagine the disaster it is, like ALL the time! Even when I pick up there always seems to be a pile on the table and one next to the computer. Awful, and I was tired of it! So I finally went and bought some baskets and things to organize this space. Now, don't get me wrong, there will always be a pile but now I have a place for it and it won't be spread out all over my countertops. Woot woot!

(I thought I took some before pictures but apparently I was too excited to get started)

So I bought a wall three tier organizer, grabbed an old clip board, my chalkboard paint and went to work. Also, I wanted a place to charge my phone and kindle without having cords all over the place so I had to do some brainstorming too!

Here is what I did, I screwed the three tier organizer to the wall, this way each girl and the hubby and I each have an 'in box'. You know, a place where homework and notes and stuff can go. In mine and my husbands bin is the checkbook register, receipts that need to be taken out and mail. Nice right!?!


Painted the clip board with the chalkboard paint and screwed it to the wall,

Grabbed my pile and placed it in this letter box,

And finally I took the mail organizer, emptied the drawers, drilled holes in the back and thread my chargers through.


And the reveal....


Isn't that so much better. I am sooooooo much happier in this space. It is not a huge change but it makes me feel like things have a place.  And when things have a place I feel at peace with the world...  or something like that.  But seriously, I just feel better when things have a place, even if they are not in it, as they usually are not in my world, I know I can put them where they belong at some point.  Not just in a stack on the table.  It makes more sense to me when I am cleaning to know where to put things.  Ok, so maybe I'm weird but it makes me feel better anyway.


I know it will get cluttered again but now I have a plan.

Yeah!


Thanks for stopping by everyone, come back and visit us again soon,

-Sarah

We love that you stopped by and cant wait to see you again soon! If you liked Yuen Yarn, check out some of our older posts, Like us on FacebookFollow Me on Pinterest ,visit our ETSY shop or come see our website www.yuenyarn.com.


Monday, July 23, 2012

Travel Art Case

Travel Art Case

I don't know about you but we do a lot, I mean a LOT of traveling.  My kids really road trip like champs.  Not that I can take ALL the blame for keeping them occupied, they do a pretty good job, plus the DVD player helps a TON!  But I try and keep things in the car to keep everyone happy too, like art supplies...

Here is how you can keep them in a nice concise package.  

use a DVD case!  Genius, right!  Not that I am the first one to think of this, I have seen it all over Pinterest.  But, here is what I did...

 All you need is an old DVD case...
And some cute paper.

Measure your paper with the original insert.  (do you ever wonder what happens to the DVD?  I do, seriously, where do they go, its like the lost socks of the house.)


 See, fits like a dream,
 Write whatever you would like to on the cover then slide it under the front plastic.

 Now it is time for the demolition of that circle piece in the middle.

I found that a pair of kitchen sheers worked great for cutting out the middle.


Now fill with your favorite art supplies!  We make our own crayons and I found that they fit perfectly in the case but I thought colored pencils would work just as well.

If you water to glue a couple of pockets in that would work great too.  I just ran out of time before we left.


Happy quiet time in the car!
-Sarah

Thanks so much for stopping by! If you liked Yuen Yarn, check out some of our older posts,
us on Facebook, or Follow Me on Pinterest

Sunday, June 3, 2012

Pantry Organization - How to Organize your Pantry


As I was cooking the other day I had a moment.  I know you can relate.  It happens to all of us from time to time.  But for whatever reason, I couldn't handle my pantry any more.  It was a disaster.  I knew it was but had ignored it for several months, really, even close to a year or so.  I had tried to do some quick fixes a couple of times to no avail.  Finally I had enough.  

It was time...

 Lets start at the beginning....... this is what it looked like before :(

First empty all your shelves...

Make some of theses boxes... (tutorial here)

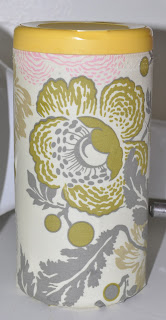
         Look, I even covered my antibacterial canister.

Buy some of these jars... ( I found mine at Ace Hardware)

Print some of these labels... (Free printables Here) - or google search free printable pantry labels and you will find hundreds of options.

Put it all together back in the pantry and in an order that you like..... and....


Voila!!!

Pantry Love!!!!!!

So this is Love, Hmmm, hmm, hmm, hmm, and I can fly!  Hmmmm, hmm, hmm, hmm! So this... is... Love!


Oh, If you can't tell I LOVE my new pantry!  It's a little bit my happy place right now.  I can just go stand in front of it and it takes me to my happy place.  (Who needs sandy beaches?)  Well, that may be taking it a little far, but seriously, sweet!

You will be sooooooo happy with your new space, and it only took me about an hour. 
Happy Organizing!
-Sarah

Thanks so much for stopping by! If you liked this, check out some of our older posts.

Saturday, June 2, 2012

Fabric Covered Boxes

DIY Covered Boxes for organizing...


I made these boxes for my pantry reorganization that I will be sharing with you tomorrow. Are you excited?  I am!!!


Let me just start out by saying that I am a use what you have on hand kind of a girl.  I make due, improvise, and otherwise scrip, save and reuse as much as I can.  

Quite frankly, I don't mind.  I kind of like making a new use out of what I otherwise would have thrown away.  


So lets do this!

Here is the tutorial for the

Fabric Boxes...

You will love them.  I know I do!

Here is what you will need:
Old box of whatever size fits your need
white paper
your favorite fabric print


 So for this I found some old shoe boxes in the girls room that fit my need perfectly!
I painted them with Mod Podge
Covered them with the white paper

Paint the white paper with Mod Podge


Then wrap the fabric around.  I left about and inch on both the top and bottom, cut a slit on both top and bottom in each of the corners and wrapped and tacked them down with the Mod Podge.  

  And done!

How easy and cute are these!?!

I am super excited to add them to my pantry.  Wait and see what it looks like tomorrow...

Happy Crafting!
-Sarah


Thanks so much for stopping by! If you liked this, check out some of our older posts, or follow us on Pinterest!