Tuesday, October 30, 2012

Craft Fail - Day two - Wax Paper to Fabric Transfer

Craft Fail - Day 2

So, if you remember yesterday, I wanted to transfer a personalized picture from a piece of wax paper to a shirt as a birthday gift.  

Well the ironing it on failed miserably.  See why here.  

But then I thought, I wonder if I painted it with Mod Podge, then stuck it on the shirt, how would that work?

Well you are about to find out, good buddy!
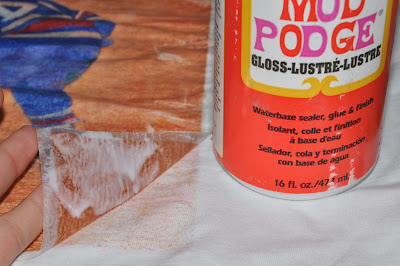
1. Paint your printed picture with Mod Podge, you can use your own homemade stuff if you like.  Here is the recipe. 
 2. Wait for it to dry... Then get the edges wet, I wanted to use a spray bottle for this so I couldn't find one.  (Have I mentioned I am all about use what is handy.  Maybe to a fault.)  
 3. Peel off the wax paper piece by piece.

Now here is another area that I could have improved.  I probably did not have to let it dry completely.  I think if I would have peeled it off after just a few minutes rather than wait a couple hours.

 4.  And here it is after I peeled off all the wax paper. For a quick experiment I think it turned out rather well but there are a few things I am going to do differently next time.
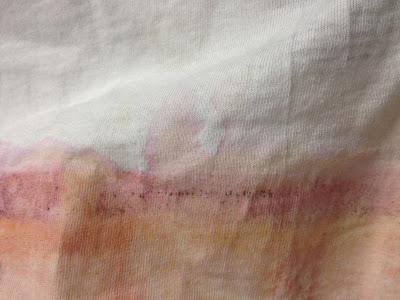


Here you can see how the colors bleed around the edges.  I think it adds a little to the whole look of it but I will still use a few different techniques next time.


GETTING CLOSER!


So one more try I think before I have a cleaner, more permanent, image transfer.  


Thanks for stopping by everyone, come back and visit us again soon,

 -Sarah

 We love that you stopped by and cant wait to see you again soon! If you liked Yuen Yarn, check out some of our older posts, Like us on Facebook, Follow Me on Pinterest ,visit our ETSY shop or come see our website www.yuenyarn.com.

Monday, October 29, 2012

Craft Fail! - Transfer a Picture To a Shirt With Wax Paper

This was a major craft fail... I have to say


So, sad panda, I really wanted to make a personalized gift for a family members birthday this week.  I wanted to take a picture of him playing hockey and place it on the back of a t-shirt for him.

Well, let me go back to the beginning, It all started when I saw on Pinterest that you can transfer a photo onto a t-shirt using wax paper.  I thought, this is genius!  I was so excited to try it!

So I went out and bought some white t-shirts and got to work.

step one said:  print your photo on wax paper.
(I know you cant really see it but that was the problem, It never transferred, I got a very light pigmentation on the shirt but nothing recognizable.)

step two: place wax paper on your shirt and iron on.

And here is where I may have made a mistake.  (or two, but we are not counting)  Mistake No. 1: I did not read the tutorial until after I was already half done with the project, I simply read the instruction in the little explanation under the picture on Pinterest (ok, so I won't be making that mistake again, I promise!)  It turns out one of the instructions were COMPLETELY different from what the web site told me to do on one site.  However, in my defense, another site said it would work....  At any rate, it didn't.

Mistake No. 2: On the one blog that it did say you could print on wax paper and iron it onto your fabric, it did not specify a time limit from printer to fabric, it did mention in one spot that your ink will remain wet until you place it on your picture.

Did I mention that sometimes I get a little ahead of myself and I maybe did not read the instructions until it was too late for that?

So, I tried it anyway and I am here to tell you that this does not work if you let it dry at all.

Major Craft Fail!

So then what?  What now that I have pictures printed onto wax paper and a bunch of white t-shirts.


NEXT... come back tomorrow to see my next attempt.  You may find that because I try things before I read ALL the instructions I will have a few craft fails before I get something that really works well.

Thanks for stopping by everyone, come back and visit us again soon,
 -Sarah

 We love that you stopped by and cant wait to see you again soon!

 If you liked Yuen Yarn, check out some of our older posts, Like us on Facebook, Follow Me on Pinterest ,visit our ETSY shop or come see our website www.yuenyarn.com.

Friday, October 26, 2012

Zucchini Cinnamon Raisin Bread

Aaaaaaahhhhh......

There everywhere, zucchini, it's still taking over my house!!!!!!!

Seriously, I don't even know what to do. So I have been trying to get creative, zucchini bread is great but I want new flavored too.

So here was an experiment and I have to say for the first try it turned out excellent!  (Trust me, it doesn't often turn out just right the first time.)
First you will need to shred your zucchini.  This is how I do it because I have sooooooooooo much!  I often will even shred it and freeze it so I can make it throughout the winter.


Zucchini Cinnamon Raisin Bread:

1/2 cup sugar
1/2 cup shortening
2 cups shredded zucchini
2 tsp cinnamon
1 egg
1 cup warm water
1 pkg active dry yeast
3 cups flour

Cream together sugar and shortening. Add shredded zucchini, cinnamon, and egg. Mix thoroughly.

Combine water and yeast. Add to mix.

Add flour.

Place in a greased loaf pan in oven at 350 degrees for about 50 minutes.


And there you have it. This bread is a little lighter than your usual zucchini bread, and has that great breakfast bread feel to it.

Just a little something new to do with your zucchini this year.

Happy baking,
-Sarah

Thanks so much for stopping by! If you liked Yuen Yarn, check out some of our older posts, Like us on Facebook,  Follow Me on Pinterest , visit our ETSY shop or visit our website www.yuenyarn.com.

Thursday, October 25, 2012

First Snow of the Season

SNOW!  Can you believe it?  

I can't, I was really enjoying the fall-ish weather around here.  It was beautiful, temps in the 40's and 50's, color, I didn't have to scrape my window when I left work... (That may be the one I am most bitter about.)


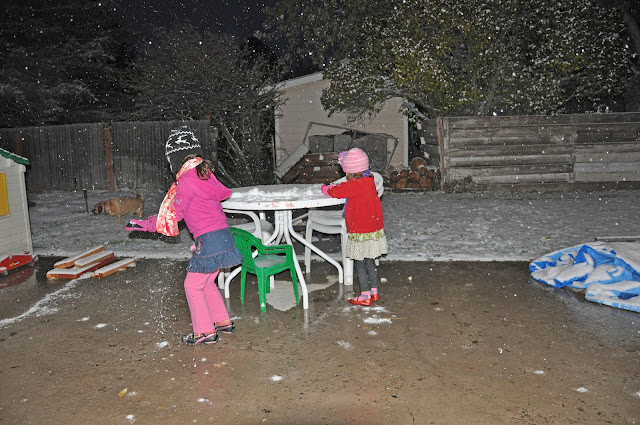
Well, it is here, I guess I should be ready.  At least the kids were excited about it.  They hurried up and put on their sweaters, hats and mittens and headed out right after dinner.  Whatever, it had to come some time, right?  LAME!  I'm just not a winter kind of girl.  I recently discovered that fall really is my favorite season.  I used to think it was a toss-up between spring and fall but this year I realized fall wins hands down for me.  I just love to wear hats and scarves and sweaters but I don't want to be cold, which is why winter is a no go.  At least not here in Montana.  It is a little harsh for me.  Thats all.  

Look at that, I still have the drained pool sitting on the back patio.  I know, it has been drained for a while but you know how some things just keep getting pushe dto the bottom of the to-do pile?  THat's pretty much what happened there.  But like I said, the kids were all about it this year.  And it did warm my heart a bit to see them soooooo excited about it.  


So here are a couple more pics of them in heaven...


Why do all kids have to eat snow?  Every time they see it?  Seriously!

Warm wishes to all of you, I'm sure it's going to come whether I like it or not.

Thanks for stopping by everyone, come back and visit us again soon,
 -Sarah

 We love that you stopped by and cant wait to see you again soon! If you liked Yuen Yarn, check out some of our older posts, Like us on FacebookFollow Me on Pinterest ,visit our ETSY shop or come see our website www.yuenyarn.com.

Wednesday, October 24, 2012

Peanutbutter Chocolate Chip Oatmeal Cookies

Monster Cookies


OMG these are so good!  One of my favorite recipes and I figured you would love it too.  

Without further ado...

1 1/2 cup peanutbutter
1/2 cup butter
3/4 cup sugar
3/4 cup brown sugar
2 eggs
1 tsp baking soda
1/2 tsp salt
2 tsp vanilla
2 cups oats
3/4 cup flour
2 cups choc chips

cream your peanut butter, butter and sugars together

add in eggs, baking soda, salt, vanilla and almond extract.

add in your oats, flour and choc chips.  

place equal spoon fulls on greased baking sheets.  

Bake at 350 degrees for 6-7 minutes.  


Done!  Your friends will love you, or hate you, or both maybe.


Your kids, as you can see, will think you are an amazing SUPER MOM!


(Or that's how I would like to think this look means!)


-Sarah

Thanks so much for stopping by! If you liked Yuen Yarn, check out some of our older posts, Like us on Facebook, Follow Me on Pinterest ,visit our ETSY shop or come see our website www.yuenyarn.com.

Monday, October 22, 2012

Updated Light Fixture

Thrifting with little one and a new project...

So Little one and I went thrifting today and we found sooooo much stuff!  We had so much fun, we had an appointment that was canceled and so we decided to go shopping instead.  We got to check out a few new stores that we have been meaning to get to but you just never have the time.  You know how it goes.  Then all of a sudden they are out of business and you never got a chance to get there.  Well that's how it usually works for me.  


At any rate, we made a morning of it and we had an absolute blast!  (Can I just say on a side note that she was absolutely obsessed with the rotary phones.  Yiayia and Grandpa have one in their garage and we may have to try and talk them out of it.)  So anyway...

I found this hanging light and I really liked, loved, HAD to have it!  

Now, I was super excited and so I forgot to take a picture of it before.  Isn't that awful.  It is not too tough to figure out what it looked like before hand though.  It was this terrible shinny brass color but I really loved the light covers, and the shape of the light.  

So, now I have painted it...

Then I put all the glass back on it.  


And hung it in the entryway (well I didn't hang it, my husband hung it, but you know.  I could if I wanted to, I choose not to.  Really I think it would take me at least 3 times as long.).  

I really love coming home to it everyday.  

Isn't it fabulously vintage.  I just couldn't do the brass.  It was too much for me.  But NOW!  Woot woot, I LOVE IT! (I sang that to you if you couldn't tell.)  

Thanks for stopping by everyone, come back and visit us again soon,
 -Sarah

 We love that you stopped by and cant wait to see you again soon! If you liked Yuen Yarn, check out some of our older posts, Like us on Facebook, Follow Me on Pinterest ,visit our ETSY shop or come see our website www.yuenyarn.com.

Friday, October 19, 2012

Double Duty (Painted Then Carved) Pumpkins

Getting more bang for your buck out of your pumpkins


So I already bought our pumpkins. I did it last weekend because last year I waited until the weekend before Halloween and the entire city was out of pumpkins. Seriously! Can you believe it. I was astounded. How can an entire city be out of pumpkins. Whatever, moving on!

So I bought them early this year to make sure I got some. We really love carving pumpkins as I'm sure you all do and you would be super disappointed if you couldn't do it one year. No, we'll maybe, but it may or may not have been meltdown central around here, let me tell you!

So I bought them already, but I didn't want to carve them yet because you know how they get. All wilty and soggy and even moldy and disgusting. But the kids were killing me with begging and pleading to carve them.

So, long story, I get double duty out of my pumpkins. We decided to paint them! What?!? I know, not that amazing but it was a serious lightbulb moment for me. We can paint them this weekend and then carve them n a couple weeks. Double for your money. And pumpkins are not that cheap. I don't know why but I am always surprised at the price of pumpkins and watermelon. Maybe because you pay by the pound. I don't know but it gets me every year.

So we painted our pumpkins, to get in the spirit I only brought out white and black and they had so much fun! Like I said, then we can carve them in a couple weeks.


Ta-Da!

Have fun with your pumpkins everyone!  We sure did!


Thanks for stopping by everyone, come back and visit us again soon,

 -Sarah

 We love that you stopped by and cant wait to see you again soon! If you liked Yuen Yarn, check out some of our older posts, Like us on FacebookFollow Me on Pinterest ,visit our ETSY shop or come see our website www.yuenyarn.com.

Thursday, October 18, 2012

Dance Tutu with Ribbon

 Dance Class

So both the girls just started dance class and we just HAD to have a tutu like all the other girls. They are so stinkin' cute in there I just can't stand it!

So I thought I would show you the tulle tutu I made for the girls to wear to class.
isn't it so cute?  And the girls love it.  

Making a Tutu for your little Princess...

First you will want fold your tulle into thirds and place your ribbon or whatever you are using as a filler.

Now gather your fabric...


You can do this either by hand basting or with your machine.  However you decide works fine.  I just find it easier to create the bunch now rather than trying to do it on the elastic.

(to do it with your machine, set the tension higher to create the gather.)


Now add an elastic head band to to top and done-ski!

****NOTE: Later I added some additional tulle around the outside of the tutu to make it look a little fuller for them.  You know, they are some girly girls, and they love to twirl, and in order to twirl they needed to have a full skirt.  Seriously, just ask them...

Your kidd-os are going to LOVE it!  And love you for it.  You may be mom of the year, at least in your house.


They are in heaven!  Tulle tutus are the best for all the little girly-girls in your life.

Happy dancing!
-Sarah

Thanks so much for stopping by! If you liked Yuen Yarn, check out some of our older posts, Like us on FacebookFollow Me on Pinterest ,visit our ETSY shop or come see our website www.yuenyarn.com.

Easy Peasy Front Door Wreath

Front Door Wreath From a Ceiling Medallion

Seriously, this is one of the easiest wreaths I have ever made, and quite frankly, I have not made a whole lot of wreaths but they look time consuming...  Just sayin'.

So, I guess lets get right to it, huh?

you will start with this...

Now take it out of the package and place it somewhere it is safe to spray paint.  


paint it your favorite color.  You see, I figure I can repaint it for every season!  I am a little excited about the possibilities.  


 Now hang it from the door with a matching ribbon and...


TA-DA!!!


Now add a little personal touch, like this spider.  The girls friend gave it to them last year around this time as part of their gift wrap.  It was so stinkin' cute I couldn't just toss it, I knew I would find a great use for it eventually.

So there you go, isn't it great!  And super easy too!  How much faster can you get?

Thanks for stopping by everyone, come back and visit us again soon,

 -Sarah

 We love that you stopped by and cant wait to see you again soon! If you liked Yuen Yarn, check out some of our older posts, Like us on Facebook, Follow Me on Pinterest ,visit our ETSY shop or come see our website www.yuenyarn.com.

Sunday, October 14, 2012

Gitter Leaves and Garland

Fall Leaves And Glitter for Everyone!

So, I think I have said before that when you do a craft with glitter it is amazing how far reaching the glitter itself can be.  So I know it can be ugly, but the kids LOVE glitter.  Why do they love glitter so much, I really can not answer that but as one of my good friends always says, 'When in doubt, glitter it out!'

I say that is a damn good idea!


So, we started with some fall leaves....

And let them paint away on them with some Mod Podge.  


 And glitter it out.  Any color you like.  We went with fall colors this time.

  I let them glitter until they were done with the craft. 
  I really liked this one.  At first I started to tell her she was painting on the wrong side of the leaf but afterward I was glad I kept my mouth shut.  

Here are your supplies you will need for your garland.  


Here are our leaves, I used both glittered and non glittered ones, just to spice it up a bit.  


Run a line of glue on the back of the leaves...


And place the string in the glue on the back of the leaves.  


And when your done it will look like this.  


The kids are STOKED that their craft is hanging in the living room.   And they had so much fun painting the leaves.  I am pretty sure they are of the same opinion as my friend 'glitter it out!'

Seriously, I think I found glitter in my bathroom, which happens to be at the other end of the house.  It gets tracked from one end of the house to the other in a matter of about 3.7 seconds.  Craziness I tell you!  Quite honestly I don't know how I would react if there wasn't glitter spread form one end of the house to the other.

Thanks for stopping by everyone, come back and visit us again soon,

 -Sarah

 We love that you stopped by and cant wait to see you again soon! If you liked Yuen Yarn, check out some of our older posts, Like us on Facebook, Follow Me on Pinterest ,visit our ETSY shop or come see our website www.yuenyarn.com.